How Using Strong ND Filters Can Create Awesome Results
By Chris Gin
As a landscape photographer I rely heavily on filters. The ones I use most often are my graduated neutral density (GND) filters which help balance the intensity between the sky and foreground. However another favourite of mine, and one which I don’t use nearly as often as I should, is my B+W ND110 netural density (ND) filter.
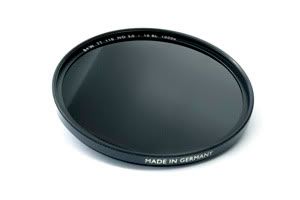
B+W ND110 Filter
This is much like regular ND filters (which are used to reduce the amount of light hitting the camera’s sensor) except it’s a much stronger version. The strength of typical ND filters range from 1-stop to 3-stops, meaning they reduce the amount of light by 2 to 8 times. The B+W ND110 filter is a massive 10-stops which means it reduces the amount of light by about 1000 times!
Why Use ND Filters
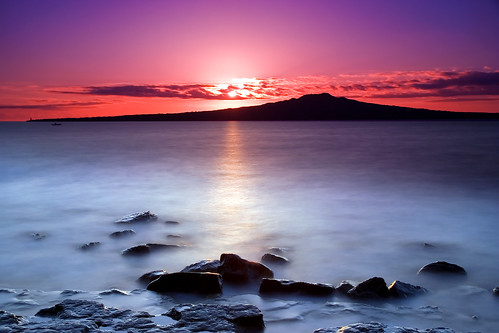
The main reason for using an ND filter is to allow you to use a longer shutter speed than you would normally be able to achieve in any given light. For example, if the exposure without a filter was ISO 100, f/11, 1/40 sec then the same shot using a 3-stop ND filter would be ISO 100, f/11, 1/5 sec. Longer exposures allow you to blur moving objects, such as clouds or water, giving an effect that a lot of photographers desire. When the light is relatively low to start with, the common lower-strength ND filters are usually strong enough to achieve the desired result.

A 3-stop ND filter in low light can achieve long exposures
Reasons For Using Stronger Filters
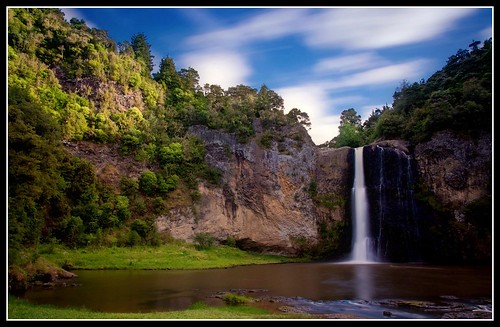
There are times when you may want to use shutter speeds much longer than the light will allow, and the only way to achieve this is by using a strong ND filter such as the B+W 10-stop. The below photo was taken just after sunrise, when the sun was already well above the horizon. Under these conditions, a 3-stop ND filter would barely slow the shutter speed enough to capture the movement of the water.
A 35 second exposure after sunrise
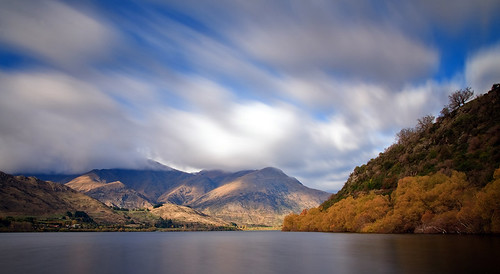
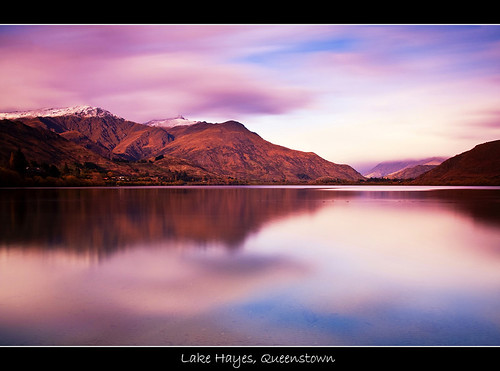
Another major benefit of such a strong filter is that it allows you to shoot long exposures during the day. Normally landscape photographers wait until the golden hours to take photos as that is when the light is at its best, however a strong ND filter offers creative opportunities outside of those hours. I find this filter especially useful when there are fast-moving clouds.
A long exposure in bright daylight
Moving clouds above Lake Hayes, Queenstown
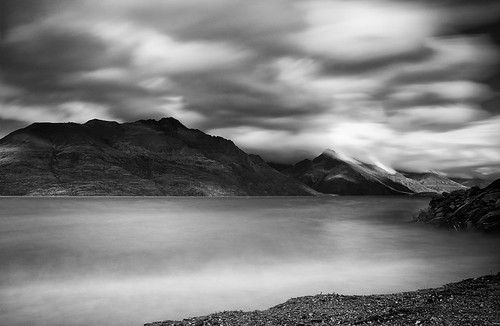
Lake Wakatipu, Queenstown
These filters are often compared to welding masks because they are so strong you can barely see anything through them. This provides a bit of a challenge when taking a photo because the filter is too dark for the camera to automatically focus or take a meter reading. To get around these problems, these are the steps I take when using the 10-stop filter:
- Compose the shot as normal.
- Focus in auto-focus mode, then switch the lens to manual focus. This will prevent the camera from trying to auto-focus once the filter is on.
- If using a GND filter, position it as per normal.
- Take a meter reading and/or test shot. Take note of the shutter speed, and multiple by 1000. Remember this value.
- Screw on the 10-stop filter. (If using a GND filter, take this off first, then put it back on after)
- Switch the camera to Manual mode and set it to the shutter speed from step 4. If more than 30 seconds, use Bulb mode.
- Take the shot.
Other Brands
The other major brand of 10-stop ND filters is Lee who have their Big Stopper . The main difference between the B+W and Lee version is that the B+W ones are screw-on while the Lee is a slot-in. A slot-in filter requires an adapter and holder, however the benefit is that it is much more convenient to use, especially when stacking other filters on top of the ND. When I use a GND filter in conjunction with the B+W ND110, it can be a bit cumbersome to set up and would be much less hassle with the Lee filter.
I’m not aware of any other manufacturers that produce 10-stop filters, however both Hoya and Singh-Ray produce reasonably strong ones. Singh-Ray’s Vari-ND and Light Craft’s Fader ND also produce variable strength ND filters, which I have not tried personally.
Summary
A strong ND filter is another tool to consider adding to your kit. It’s not something you’ll use every time, but it can give you some creative options when you may not otherwise be shooting.
Check out more photos from Chris Gin at his Website, Flickr and Facebook.
No comments:
Post a Comment