How to Reduce Your Depth of Field in Photoshop
By Christopher O'Donnell onYou’ll need an image with an identifiable (in-focus) subject and some distance between it and your background. In short, it needs to appear logical that the depth of field could be shallow, so an image of a model flat against a wall won’t be too convincing.
Your depth of field should be edited in two parts: first your environment (everything but your subject), and then just for the subject itself.
I tend to use a shallow depth of field for most of my images so it’s a bit difficult to find an example image that’s entirely in focus. Instead, I decided to choose one that I can add more lens blur to (below).
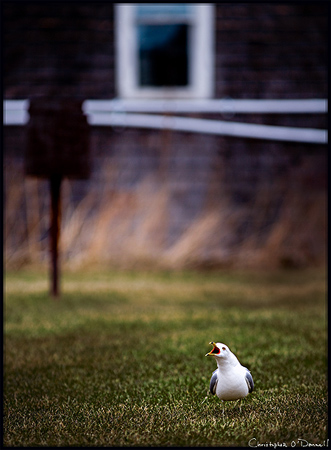
Photo by Christopher O’Donnell
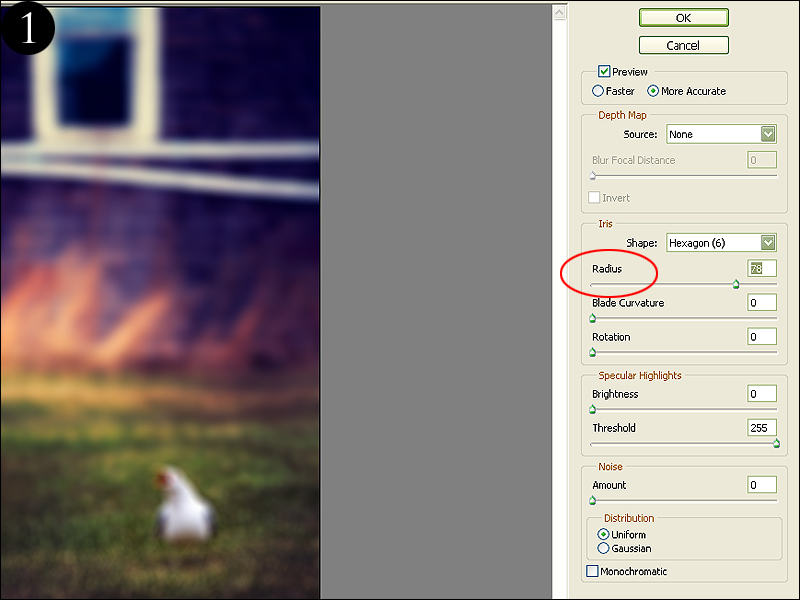
1. Duplicate your base layer and click Filter > Blur > Lens Blur. We’re going to apply a lens blur to your top layer and then mask it so that the original (sharp) version underneath can selectively show through.
2. Adjust your Lens Blur settings as desired, most notably the radius as this determines the strength (Figure 1). Typically I like to blur too much rather than too little since you can always reduce the opacity of your blur layer if you’ve gone too far. Click OK to apply and return to your image.
3. Add a layer mask to your image and select your Gradient Tool, making sure the settings you have reflect what is shown below:
The gradient tool will help you create an even transition between out of focus areas and in-focus areas. Once you have decided on a focal point (typically your subject), you’ll want to make all the areas in front and behind blurry with a gradual transition.
In my example below (Figure 2), I want the seagull to remain in perfect focus, with the environment surrounding it (the grass and the building) to be blurred more.
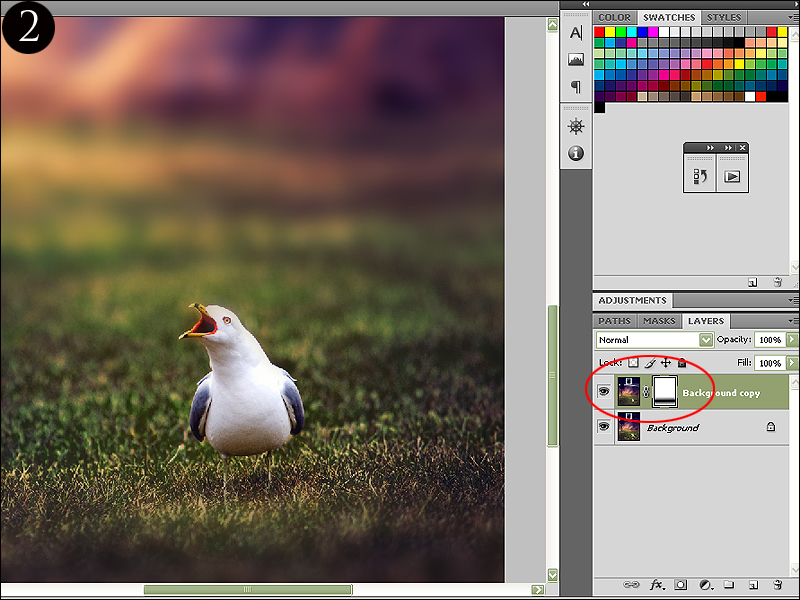
With your gradient tool selected, click and drag (on your layer mask) the area surrounding your subject. This will punch a hole in your blur layer so that the original (sharp) photo beneath will be visible, with a smooth transition between your blur layer and the original image – this will recreate the gradual blurring you see when using a shallow depth of field. Your layer mask should look something similar to the one in Figure 2.
As you can see, the grass in the foreground and background is now a bit more blurry. The seagull is also a bit blurred itself – an unwanted side effect of the gradient tool that we will fix in our next step. This will probably happen with your image – where your subject will adopt the blur – but remember, we’re focusing on blurring our environment first and THEN the subject, so as long as you have a gradual and pleasing blur to your surroundings, your editing is successful so far.
4. Select your brush tool with the foreground set to black and background set to white. We’ll be using this tool to customize our layer mask so that the hole we just made hugs the contour of our subject – the seagull.
With a brush size suitable for your subject, an opacity set to 100%, and a hardness level of around 50% to start, begin to brush over your subject. You can adjust your hardness as needed if the transition between the blurry background and the edge of your subject is too soft/sharp.
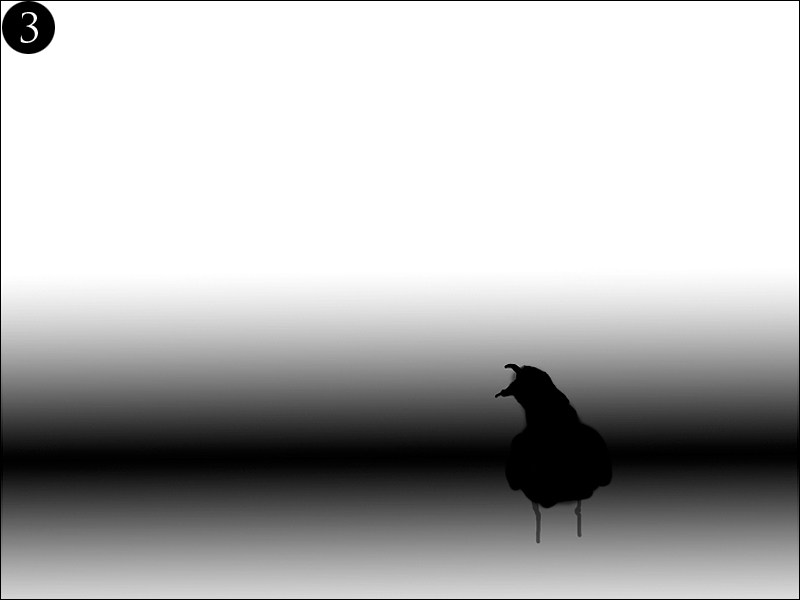
When we look at my somewhat hurried layer mask (Figure 3), you can gather a better idea of what we’re trying to accomplish. The areas in black are hiding the blur layer and allowing your original image to poke through, and the white areas indicate that your blur layer is completely visible. The varying grey tones you see represent the gradual transition between layers that we applied with the gradient tool.
Actually, the gradient mask I added should be a bit lower – at the seagull’s feet to be precise as that is where we want the focal point to be – but you get the point.
Ultimately, the best way to get a natural lens blur with authentic bokeh is to do it in-camera, much like many editing techniques we recreate in post process. However, this is a great way to reduce your depth of field and help eliminate a distracting background – especially with portraits – when using a wide aperture wasn’t an option. Try out different brush sizes and layer opacity levels, and don’t be afraid to tweak the settings detailed here to get the results you want. Remember: Photoshop tutorials are guides at best, not rules!
No comments:
Post a Comment