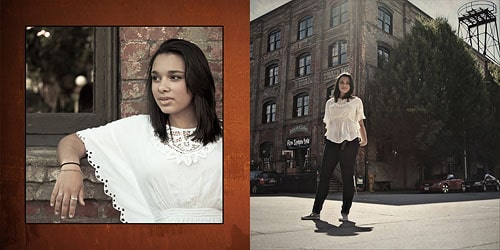
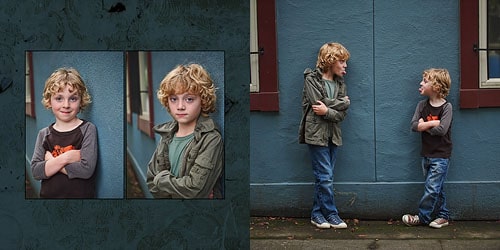
Friday, November 26, 2010

7 Tips For Photographing Children

7 Tips For Photographing Children


Be patient with them.
Some kids will warm up to you immediately. Some won’t. Work on the child’s schedule, not yours. Instead of picking up the camera right away, sit down at their level and play with them or read them a book. Become their friend first, and they’ll trust you the rest of the day.

Capture who they are, not a standard photograph.
One of my favorite photographs of my daughter was when she was two. She was staring out of our living room window, thumb in her mouth, twirling her hair with her fingers. That was so her at that particular moment of her life, and I can’t imagine not being able to remember her like that. Just looking at that image brings back a ton of memories. That’s who she was at that moment, and that’s what we strived to capture.

You’re the photographer, mom is the mom.
Have you ever had the mom put a child down and start saying, “Look at the camera Suzie”. Explain to the mom up front that you will be capturing the image. She’s welcome to sit in a chair in the corner, but please leave the posing up to you. (If she sees your work ahead of time and knows what to expect, this won’t even be an issue.)

Go to the child’s world.
What does the child like to do? Brining them in and letting them play with your teddy bears may make a cute photograph, but bringing his or her own teddy bear to a tea party will make it even more special. They’ll talk and tell stories, and open up in a way they just can’t do with a “stranger”.

tips for taking better childrens portraits

Create your setting first.
What is your goal with the portrait? What is the mom expecting? You have to have samples in place to get your ideas across before you bring in clients. Start by building sets and using your own children (or a friend’s or neighbors) as the models. Then sell it to your clients through your website and portfolio.

Focus on things that will change.
A three-year-old child has that perfect, angelic face. She has expressions and that certain look that just screams out “I’m three”. That’s what changes very quickly as she grows, and will soon be forgotten as she moves into other stages. That’s what you need to capture as a photographer. Look for that perfect picture, that perfect expression that will make the Mom think of you as a hero for life, because she simply can never take that image off of her wall.

Let’s see the face.
Children have the most amazing eyes. So while I’m a huge proponent of capturing a child in his or her natural environment, I also love beautiful face shots. And so do your clients. Focus in on the eyes. Give your clients something they can never refuse.

Shoot your portraits with specifics.
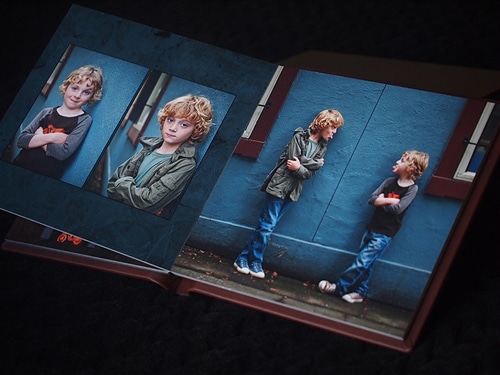
Never hand over your files on a CD to your clients. Instead sell them on packages with certain inclusions. Find unique frames with multiple images. Build grandparent brag books. Or give them a way to come in and build special scrapbooking pages for their latest album. Always be thinking of today’s requirements and desires, and find ways to implement into what you do. Most people don’t truly want the CD IF you give them products they really want – they’re just programmed to ask for it.

3 Ways To Price and Package Your Wedding Photography To Stay In Business


3 Ways To Price and Package Your Wedding Photography To Stay In Business


I’ve been reading a ton of rants this past week on the state of wedding photography, and whether a photographer can truly have a full time business photographing weddings. Those of us that have “been there, done that” know its more than possible – I routinely pulled in $250,000 and more each year photographing around 25 weddings. Yet those consistently charging “nothing” for their services are turning the industry into something that makes it difficult to earn a full time living with.

So in this post, I thought I would share 3 tips to help you price and package your wedding photography better, and hopefully answer many of the questions I hear every day when it comes to selling your services.

1. Quit confusing your potential customers.
I randomly chose a wedding photographer out of Google (I see the same type of wedding packages everywhere) – here was his pricing structure.
 Wedding Package 1
    pricing and packaging wedding photography
  • Up to 5 hours of photography.
  • Over 200 4×6 professional prints plus the same images on copyright-free CD
  • 11×14 Portrait Print – choose any image from your wedding photos
  • Choose $50 in additional prints
  • Online gallery of your wedding photos to share with friends and family worldwide.
Wedding Package 2
  • Up to 5 hours of photography.
  • Over 200 images in print and on copyright-free CD
  • 20 page 8×8 or 8×10 album
  • 11×14 Portrait Print – choose any image from your wedding photos
  • $75 in additional prints
  • Online gallery of your wedding photos to share with friends and family worldwide.
Wedding Package 3
  • This package includes six hours of shooting time on your wedding day plus a 20 page custom designed album.
  • 6 hours of photography.
  • Mix of color and black and white, creative effects.
  • 250+ professionally processed wedding photos, in print and on copyright-free CD.
  • 20 page custom wedding album – all prints on archival quality Kodak Endura Pro Paper
  • Album is top quality, elegant and built to last a lifetime.
  • 11×14 Portrait Print – choose any image from your wedding photos
  • $100 in additional prints
  • You wedding album is displayed online as it is created so you can comment on it as it is designed

Wedding Package 4
  • 6 – 7 hours of photography.
  • 300+ professionally processed wedding photos, in print and on copyright-free CD.
  • 20 page custom album.
  • 16×20 Portrait Print – choose any image from your wedding photos
  • Choose $125 in additional individual prints
  • Includes your choice of the Engagement Photo package, or $100 in additional prints
Wedding Package 5
  • Includes everything in Wedding Collection 4  plus……
  • Wedding albums for Mom – one album for each of your moms.  Same photos as the bride’s album
  • (2) additional 11×14 copies of your portrait print
All five packages ranged from $1000 – $2100. Now lets analyze them. What’s the difference between 1 and 4? 2 and 5? How about 4 and 5? Difficult to tell, right? Sure, it’s a few photographs here, and an extra hour there. But if its hard for a photographer to tell the difference, how can your prospects tell? Do they really understand the difference between 50 photographs? And does one extra hour truly mean that much? What if they book the bottom package, and need an extra hour – they won’t even ask. They usually just book and let you deal with it the day of the event.
Don’t create too many packages that it leaves very little difference between them. Instead, focus in on huge differences, and make your customer instantly aware of what they need.

2. Watch your words.
Let me give you a set of words. Think of the meaning of each set, and which one appeals to you more.

Shoot  -  Photograph
Images  -  Pictures
Collections  -  Packages

See the difference? Watch an ad for BMW, or look through ads for elite stores like Nordstrom. They speak differently about their products and services than companies like Kia and Walmart. Because they are charging more, and reaching out to a different clientele, they speak in a different manner.

The same goes for your photography. I read comments by people all the time wondering who would pay $10,000 or more for wedding photography. If a bride is having an original Vera Wang gown (not dress) created for her, would she really hire a photographer who’s only charging $1,000? Of course not. The math doesn’t add up. If she spends $5,000 on her bouquet, and $7,500 on her cake, why wouldn’t she spend $15,000 or more on her photographer?

But she also would never hire anyone who is going to “shoot” her. She wants an elegant collection or original images that capture the beauty and grace of her special day.

3. Restructure the order.
In the above example, the photographer listed his cheapest package first, and proceeded to build from there. As the price goes up, the bride gets more confused, she shuts down, and quits reading forward. Why should she pay any more for a package – why not just take the first one and get it over with?

Instead, start with your top package and work down. Stick with 3 of fewer collections, and again, make a dramatic difference between the two. Now look at the following collections, and see what you think.

Collection One
  • Unlimited amount of time, as our goal is to give you complete coverage from beginning to end.
  • Unlimited number of photographs – how can we count your images as they are being taken? What if we hit 200, and you haven’t cut the cake yet? We wouldn’t be professional if we didn’t promise to capture every detail, from beginning to end.
  • $2,000 credit to apply to any of our products, from album design, to framed portraits, to gifts for your parents and attendants
  • Full online viewing to make your selections.
Collection Two
  • Perfect for small, intimate gatherings with less than 25 guests.
  • Four hours of coverage, one location only.
  • Unlimited number of photographs during our time with you.
  • $500 credit to apply to any of our products.
  • Full online viewing to make your selections.
By putting your most expensive collection on top, they start big and work their way down. They often come up with a compromise towards the top of your price list instead of at the bottom.

Tips For Taking Better Holiday Portraits

Tips For Taking Better Holiday Portraits


This week it’s Thanksgiving here in America, which means it’s the start of the holiday season. Family and friends will be together more, meaning more opportunity for potential portrait sittings.

The larger the group, the more opportunity you have to sell. Yet if you have a small home studio, or no studio at all, where are you going to photograph everyone? While it may not be a problem if you live in a nice warm climate, what do you do when the wind is howling and the snow is falling?


Find A Perfect Location

Don’t scout the perfect location on your own; talk with the family as well. Maybe they are members of a local country club that would be more than willing to let you use their area for a portrait. If they are planning on going out to eat after the portrait, maybe you can work with a local hotel, and use their surrounding grounds. Parks also can be very attractive in both winter and summer – how about an ice skating pond in the distance? Use your imagination, and try something new. Don’t be afraid to ask – you never know where you can end up for a perfect portrait experience.

Find A Backup Plan

Now that you have ideas, choose one more. You never know when you’ll wake up to a foot of snow, or temperatures so cold no one wants to be outside. If you can quickly move from one location to another, and have your ideas in mind, it will mean less frustration on your part. And will make your portrait run smooth no matter what happens.

Understand the Family Dynamics

New moms may not want a small infant outside in the cold, even if another member of the family set up an outside portrait. Chat with the person booking the appointment about the individual groups, ages, and personalities. People will usually tell you many things, such as the family who is always late, or the family that never listens to directions and shows up wearing whatever they want. If you know this ahead of time, you can take special precautions up front. A quick phone call confirmation may keep everyone on track.

Break Down The Groups

Before the portrait day, get a list of families and relationships. It’ll be easier the day of the portrait if you know the groups, and can easily call them and place them together. You’ll want to take the obvious family groupings:
  • Entire family
  • Grandma and Grandpa
  • Son, wife and kids
  • Daughter, husband and kids
Then move to the less obvious, yet sure sellers.
  • Grandparents and grandkids
  • Sons and daughters
  • Grandparents and sons and daughters
  • Generational images
Ask for special requests as well. The more you take, the more you can build in opportunity for sales.

Clothing Consult

Chances are you’ll be working with one or two family members for the set up of the portrait. While it’s easy to rely on them, to do so may mean your information only gets so far. Get family names and addresses at the time of booking, and send out a quick letter explaining clothing choices. Specifically tell them if they should be in blue jeans, or their Holiday best. Go over colors, patterns, and styles, and why its important to keep everyone looking the same in a portrait.

5 Photo Composition Hints. The Fourth Element - Space

5 Photo Composition Hints. The Fourth Element - Space


IV. Space Composition

The nature of space composition in photography has analogy with the subject of the theory of music, so it's possible to use a term "visual ear", which is similar to music ear. Its quality lies in the differentiation of harmonious and disharmonious combination in composition. In music it's a combination of notes, sense of rhythm, sequence of chords. In photography these are proportions of forms, color and lighting, the developing subject, different levels of the detailed elaboration.


In the same way as the color is a material for emotional composition, in space composition it's geometry. But on the highest level geometry isn't the only element for space composition, as it is also built with the help of mental forms of subject composition and the combination of emotions and colors.


Behind the Gare St. Lazare, Henri Cartier-Bresson

If we analyze best photo works of all times we can notice that they are created on the basis of gold proportions of geometry. All parts of a photo should be balanced. If you create a central composition, you should know why you do it in this very way. Regular usage of the rule of Odds, rule of Thirds, Golden Mean, Golden Ratio and rules of perspective will allow you to create composition even without thinking a lot. You can read more about all these rules in our articles Composition Photography Rules and  What Everybody Ought to Know About Composition.


Henri Cartier-Bresson

There are three kinds of composition: frontal (2D), volume (3D) and deep space composition (so called four-dimensional). This differentiation is rather relative, because in practice we have various mixes of compositions.
If elements are placed on one surface vertically or horizontally according to the viewer it's a frontal composition, that always looks flat, hasn't got any kind of perspective (linear, tonal, etc.). It's more interesting to examine a three-dimensional shot, which consists of a form, having a relatively closed surface and being perceived from all sides. Its expressiveness and clearness depend on the angle of view, horizon line, surroundings, objects, which build this form. Space composition is formed with elements, volumes, surfaces, space and intervals between them. The feeling of deep space rises if some elements divide the space to the number of planes (the foreground, middle plane, background and so on). It's also considered that one of the main space composition elements is time, or it's more correct to tell "feeling of time", and it's a work of a master if you can feel it in the shot.

Types Of Composition In Comparison

Frontal Composition3D CompositionSpacial Composition
Dominance:objectspaceintegral whole in space and time
Lines:parallel, without crossing pointconvergent, point-focused linesspherical perspective, curved lines
Plastic:geometrysculpturestructure
Planes: one plane, as a cutoutlinear perspectivecolor-tonal perspective
Rhythm:metric order (equal distancerhythmic order (reducing distance)max rhythmic order (vanishing distance)
State:staticmovementaction
Geometry:symmetrysymmetry + asymmetryasymmetry
Color:complementary colors (opposite on the color wheel), equal amountanalogous colors (close on the color wheel), unequal amountone-color tones, tonal softness, color nuance
Space:closedlimitedunlimited

Be attentive when cropping your shot. Cropping and its proportions is a point of rest in your future composition. If you gained a foothold you've already done half of the work. It's rather important for a novice to learn how to feel the crop, so it's not recommended to use wide-angle lens and telephoto lens, doing first steps in photography, because they distort real proportions of the shot and its perspective. A mistake in space composition is critical for the whole shot as a false note.


We use a lot of terms to describe composition. Among them are lines, shapes, forms, colors, unity, subordination, dominance, coherence, balance, rhythm, positive and negative space, proportions, chaos and so on. We suggest you  reading not a very long article (but rich in content) "COMPOSITION & the ELEMENTS of VISUAL DESIGN" by Dr. Robert Berdan.
Henri Cartier-Bresson
How To Develop Visual Ear?
We should admit that the nature of musical and visual ear is almost not studied as a subject of progress. It's an intuition that helps to create great works in every sphere of Art, from physics to acting, from archery to photography. Every canon, every rule is just a basis of development: using the rules without an intuition, one can possess only technical skills. But it's also a possibility to train to that level, when you don't think about technical side, but allow your mind to make qualitative change.

The Main Tip for the visual ear development is to start taking photo-etudes.

  • It's a composition of natural origin, don't manipulate with objects to make it possible to realize and calculate their spacel interaction.
  • Exclude subject composition from your shot. Perceive a composition as a combination of geometric forms, not paying attention to the story, color, sense or showy content.
  • Try to avoid beautiful, effective or shocking objects. Portraits, nude, glamour models, landscapes are stricken off.
  • Don't be carried away, playing with DOF, photo effects here are the unnecessary luxury.
  • The main task is the viewpoint that you should "find out" yourself.
  • You don't need to go far away for shooting photo-etudes, you can find a good one even at your place.

Paris, 1953. Marc Riboud

Practice makes perfect!
Every learning process is started slowly and consciously. Step by step, through the repetition the quality is born. The feeling of composition is something we can train and foster, so let us do it!


The Definitive Guide to Stabilising Your Camera for Crisper Shots

The Definitive Guide to Stabilising Your Camera for Crisper Shots

By lightstalking


Camera shake is a problem that almost every photographer is going to experience. Sometimes there’s just nothing you can do, but in most cases there are a few tricks you can use to get a little bit of extra stability. Here are some things you might like to think about, next time you get jolted out of a perfectly focused shot.

Holding the Camera Correctly – This really should be your first port of call when you’re getting photographs that are blurred due to movement (assuming you don’t want that blur). One of our early articles on how to hold a camera correctly has been consistently popular, somewhat controversial and is worth a re-read every now and then.

Tripod – No big secret with this one, but the thing to remember is not to be cheap when getting one. You really only ever need to buy one tripod, so make sure it’s a good one. You can also read our Twitter follower’s advice on how to buy a tripod.

Photographer, Camera and Tripod: Shadow Self Portrait, Spirit Withinphoto © 2010 Dominic Alves | more info (via: Wylio)

Monopod – You can use a monopod with a surprisingly long shutter speed if everything is steady and it beats carting around a huge tripod in many situations. If you’re a hiker, then you can also use it as a walking stick and it makes a convenient club when the situation really goes south (jokes). Manfrotto makes an excellent one that simply pulls out to extend and locks without needing you to tighten each extension manually.

String, Washer and Bolt- This is a fantastic little device that you can make at home that doesn’t take up any room and weighs next to nothing, but will keep your camera surprisingly stable. You stand on the washer on the end of the string which is attached to your camera and pull it taught. You can read exactly what I am talking about here.

Gorilla Pod – Basically a tripod with bendable legs that lets you wrap them around stable objects and secure your camera in whatever position you think is suitable. Get a larger one, because the smaller models tend to sag under the weight of heavy lenses and bodies. Not everyone likes them, but if you have the space and money, then they can come in handy in many situations.

Joby Gorillapod SLRphoto © 2008 Rob Nunn | more info (via: Wylio)

Put it Down and Use the Timer – Every DSLR and most point and click cameras have a timer function. This let’s you put the camera down and step away before the frame is shot. It’s the poor man’s tripod and if you can find a suitable place to put your camera, then it works just as well as a tripod.

Lean Against Something – Bracing yourself against a tree or fence or any stable object and holding the camera properly will let you open the shutter that little bit longer. It differs from person to person as to how long that might be so do a few tests first to see if it reduces your movement enough.

Brace – Simple getting yourself into a better and more stable position will help. This might mean sitting down and leaning on your knees like the photo below. It might mean pulling your elbows into your sides more tightly. It varies from situation to situation.

Taking careful Aim, Bracing - Female Photographer Dawn Beattie 29 April 2010photo © 2010 Mike Baird | more info (via: Wylio)


Shoot With Mirror Lock On – This is a slightly more advanced technique that is most suited to long exposure landscape shooters who are looking for absolute clarity in their shots. It only works with cameras that have the mirror lock function, but you can read about the technique here.

Setup Out of the Wind – Shooting landscapes in the golden hour or blue hour can be very frustrating if it’s a windy day. Even with a tripod, your camera can get moved around and even slight movements can ruin a shot. If possible, simply set up out of the wind. The same rule applies for setting up near heavy machinery or highways that are likely to move the camera – try to find somewhere else.

Try Image Stabilized Lenses – Many lens companies have developed technology to vary the optical path to the sensor according to movement. With Canon, it’s their range of IS (image Stabilization) lenses. With Nikon it’s called VR (vibration reduction). Most other major lens companies have a range of image stabilized lenses (but rather inconveniently, they all call it something different).

Try Sensor Shift Cameras – Several camera manufacturers have built bodies that allow the sensor to move to counter the movement of the camera body. Konica Minolta makes the “Steadyshot” line of cameras. Olympus makes some too as do Pentax and Fujifilm.

Match Shutter Speed to Focal Length – The rule of thumb is that shutter speed should be set to 1/Focal Length. That means that if you are shooting at 500mm then your shutter speed should be 1/500 or higher. You can read more about shutter speed here.

Some of these tips should be fairly obvious. Others you might need to practice a little first, but getting a stable camera when you want it is a skill that will save you a lot of heartache.


14 Striking Samples of Telephoto Photography

14 Striking Samples of Telephoto Photography

By lightstalking


Getting telephoto photography right is not an easy thing. For starters you need the gear which is pretty expensive, even by photography standards. Secondly, and perhaps most importantly, you need the patience of a saint – especially if, as in the examples below, you are trying to capture a moving object such as an animal. It’s perhaps for this second reason that we find this examples of telephoto photography to be so impressive.


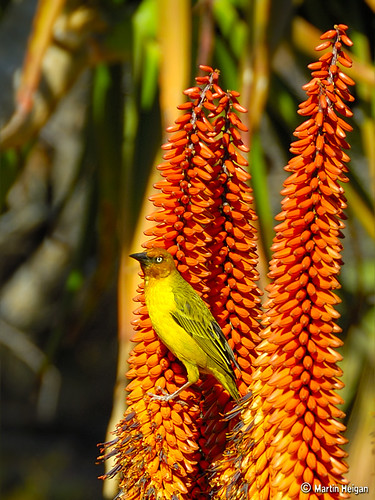
Cape Weaver bird on Aloe ferox flowers
Cape Weaver bird on Aloe Ferox flowers by Martin_Heigan.

Double-collared Sunbird male on Kalanchoe luciae flowers
Double-collared Sunbird male on Kalanchoe Luciae flowers by Martin_Heigan.

Parrot
Parrot by etrusia_uk.

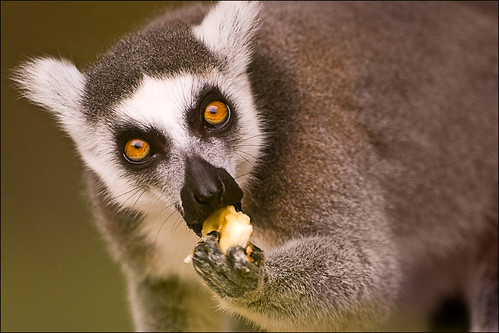
Cant talk, eating
Cant talk, eating by etrusia_uk.

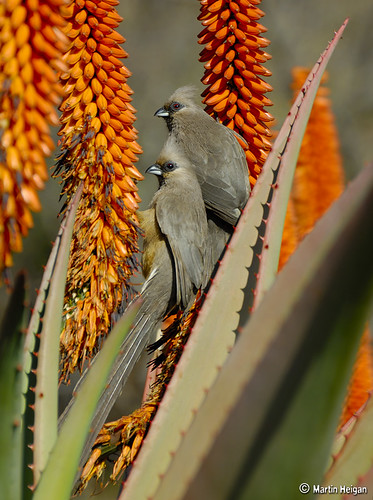
Mousebirds on Aloe ferox flowers
Mousebirds on Aloe ferox flowers by Martin_Heigan.

Adult Sea Otter (Enhydra lutris)  in Morro Bay, CA
Adult Sea Otter (Enhydra lutris)  in Morro Bay, CA by Mike Baird.

~ Tricks For Treats ~
Tricks For Treats by ViaMoi.

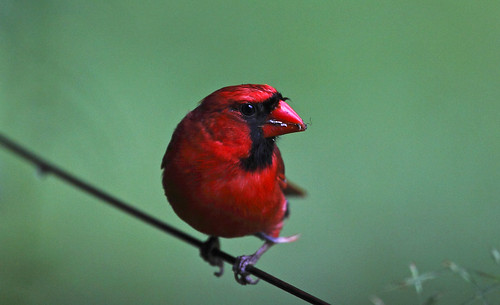
Cardinal having a snack
Cardinal having a snack by ToddBlm.

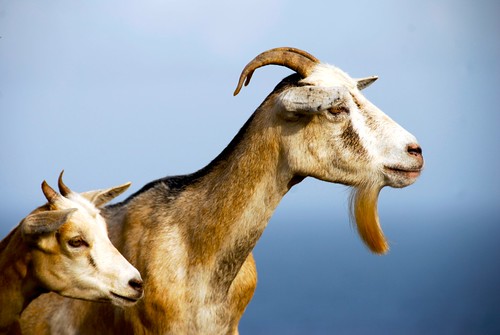
Chèvres
Chèvres by sharkbait.

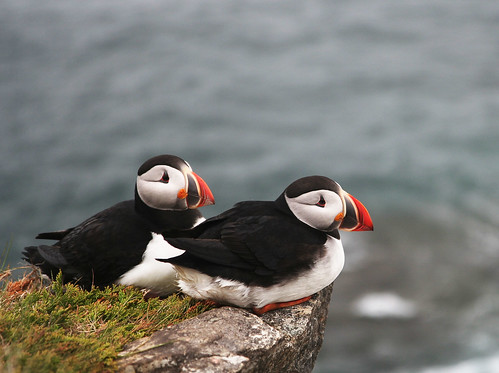
puffins
puffins by Wen Z.

Busch Gardens Weird Bird
Busch Gardens Weird Bird by etrusia_uk.

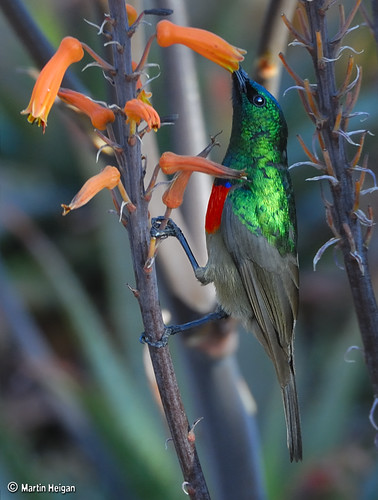
Double-collared Sunbird male in the shade
Double-collared Sunbird male in the shade by Martin_Heigan.

Meerkat
Meerkat by etrusia_uk.

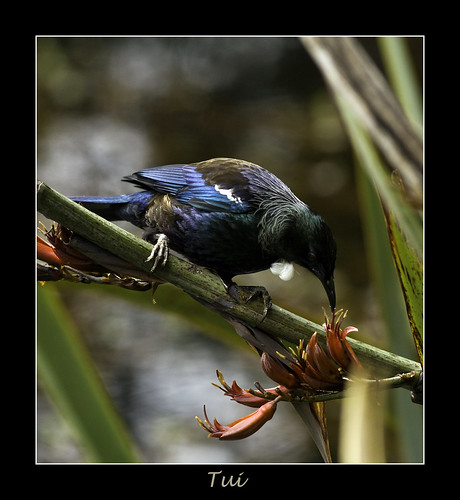
Tui
Tui by Light Knight.


7 Easy Tips to Sell More Photography Albums

7 Easy Tips to Sell More Photography Albums

by Andrew 

Fundy, Avatar This is a guest post by Andrew “Fundy” Funderburg, the creator of the Fundy Album Builder and Fundy Album Proofer. Please check out the free trials available at http://www.fundysos.com. If you were looking to design albums yourselves, I highly recommend Fundy’s products.

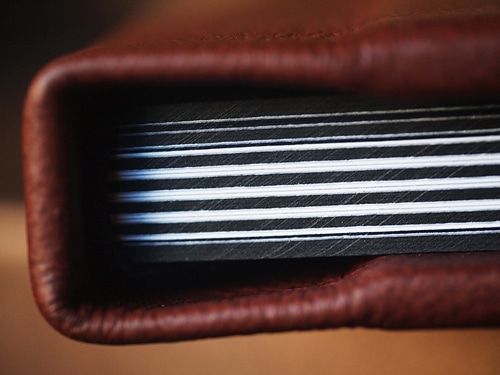
I firmly believe that fine art albums are the finest representation of good photography available wedding and portrait market. They allow the photographer to to create a family heirloom that can be handed down through generations. In the age of digital where hard-drive crashes and the fact that DVDs and CDs erode over time, a fine art album is one of the few ways to truly preserve the story of the day. A finely crafted leather album printed on true photographic paper will last, literally, hundreds of years.

I want all of my clients to preserve their photos in fine art albums. Yet, with the cost of the album, plus the cost of design, these can be significant investments for clients. So, the question is, how can we help more of our clients choose these albums, which we firmly believe are the best way to preserve their story, their day and their family’s memories.

Tip 1 – Show more albums

Tips For Selling Albums By Fundy

This may seem like a no brainer, but people only buy what they can see, touch and feel. I’ve hear of photographers complaining that they never sell anything beyond a 10″x10″ album. But, later I find out that they only show 10″x10″ albums and give the option to upgrade the size. But the client can’t know what a 12″x12″ or 14″x14″ feels and looks like without holding that album. In the studio, photographers need to have samples of each and every size they want to sell.

Tip 2 – Show big and fancy

Tips For Selling Albums By Fundy

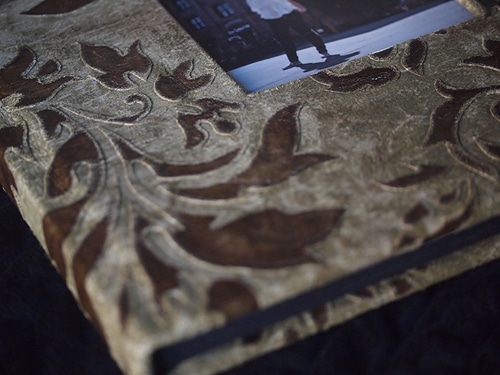
Samples should be big and fancy. Have at least one sample of the largest album your album company offers. If they offer a 12×18″ album, get a sample of it. To keep costs down, only put in the minimum amount of pages (usually 20 pages). If your album company offers cool metal covers, get one. If you like those cool, expensive plexiglass covers, get a sample. By offering larger albums with fancier covers, it validates the cost of the regular leather albums. And it shows to the client, the fine art capabilities your studio has to offer.

Tip 3 – Tell clients what “most” people are buying

Tips For Selling Albums By Fundy

Clients usually only get married once (well maybe twice) in their lifetime. For the most part, they don’t know how to get married. They don’t know what they should do with their photography, they don’t know how to preserve it, how to show off their day. For portrait clients it’s basically the same. Senior photos are taken once in a lifetime. Families usually only have nice professional portraits done once or twice before kids are grown up and out of the house. It is part of our job description to let them know what we can do and what other clients are doing. Tell them that “most people are getting an album like this.” or “An 8×8″ cloth covered album is our most popular portrait album.” or “A lot of people are getting our new leather options.” Let them know this information during the consultation or on the day of the shoot. People need to digest this information and see pricing before viewing the images. If you design beautiful albums, they will want one, but they need time to justify the cost.

Tip 4 – Shoot for the Album

Tips For Selling Albums By Fundy

If we, as photographers, need to shoot differently if we want to sell more albums, versus, individual prints. Albums are all about telling stories. If we have one fantastic shot, we need to take supporting shots. This philosophy is ingrained in most wedding photographers, but the same philosophy needs to be adopted by portrait photographers. When you have “the shot” set up, also take accent shots from different angles and with different lenses. A shot with a long lens, cropped into the subject may have a great accent shot with a wide angle showing the landscape around the subject. So, shoot once, move around and take 3 more shots.

Tip 5 – Use albums as hooks in your packages

Tips For Selling Albums By Fundy

If you want to sell more albums, make them the centerpieces of your packages. In all of your wedding packages offer album credit. In wedding packages, album credit usually works better than actual albums (e.g. a 30 page 10″x10″ album). With so many sizes and options to clients for wedding albums, credit allows clients to create their own ‘dream’ album without confusing upgrade options. For portrait albums, using different sizes in different packages works well. For example, a 5×5, an 8×8 and a 10×10 option in three different packages. Additionally, you can offer upgraded covers (e.g. leather) in larger packages.

Tip 6 – Break down your workflow

Fundy Album Builder

Albums are big projects, especially when you get over 40 pages. They involve not only the design, but also the proofing of the album to the client. When designing albums, I have pre-made folders with page numbers on them (e.g. 0203) and I drag the images for those pages into their own folders. This helps me organize each spread separately and speeds up the design process. For proofing the album, I realized that proofing needed an organized, visual solution and that is why I created the Fundy Album Proofer. I did the same with my Album Builder. I needed an organized way to make gorgeous, high-end albums. When you choose your software tools for albums, make sure that they fit your workflow and will not only help you produce and proof gorgeous albums.

Tip 7 – Know your profits

Fundy Album Builder

While this is not necessarily related directly to selling more albums, it will affect your ability to provide albums in the future. If you are not charging enough for your albums, you’ll quickly get bogged down in the work of offering albums and they will quickly become a drain on your business instead of a boon to your business. Add all of your costs together, the cost of the album, the cost of the extra pages, the cost of designing the album (the cost of your time to design the album) and the cost of meeting the clients and proofing (again, the cost of your time). What most photographers forget is to do is charge for their time. But we don’t want to work for free, do we? Take all of these and add them together. Now, the PPA recommends a maximum of 35% cost of goods. This means that for every $1 you make, it should cost you no more than 35¢ to produce. The easy way to calculate this is take all of your costs, add them together and divide by 0.35. For example, if it costs you $350 to produce an album, you should charge around $1000 for it. If you are on the higher end of your market, you can go smaller, for example 25% or divide by 0.25.

I hope that these tips help you sell more albums and helps your clients discover the joys of having a fine art album for generations to come.

7 Guidelines for Better Flower Photography

7 Guidelines for Better Flower Photography

By lightstalking 


One of the most consistently popular subject choices among photographers are flowers. In fact flower photography is also the subject of the most popular thread in our own forum. So we thought it was time to share some best practices for getting great photographs of this wonderful subject.

1) Get Closer – This is a tip that applies to flower photography as much as it does to most photographic subjects. Filling the frame with your subject will produce consistently better images than standing back to get “overall” shots.

A 3mm succulent flowerphoto © 2008 Mike Keeling | more info (via: Wylio)


2) Even Lighting – In most situations you are going to want to make sure the lighting is even across your shot. This means that cloudy days are great for shooting flowers. So are afternoons and mornings. Shooting in midday sun will often blow out the colors in your images and give you unwanted harsh shadows. There are one or two exceptions to this guideline such as getting back-lighting on a flower, but generally even lighting is the way to go.

Desert Flower.photo © 2006 chany crystal | more info (via: Wylio)


3) Depth of Field - In general you will want to shoot with a wide open aperture so that your background is out of focus and your flower in crisp focus. You can even use the macro setting on most cameras which, as luck would have it, is usually indicated with an image of a flower! Just remember that in some situations, such as when you are close but want every part of the flower in focus or when you have several flowers that you want in focus, you may need to close your aperture.

Blue Flowers Depth of Fieldphoto © 2010 Steven Zolneczko | more info (via: Wylio)


4) Steady Your Camera – Shooting close up can present problems with camera shake. You can also have problems if you are shooting with a closed aperture. The easy way to avoid any potential problems is to take a tripod or make sure your camera is stable. Check out our guide to camera stabilization for more information on that.


5) Get Down Low – Don’t just stand up and take a shot of the face of the flower. While that can work, you are still more likely to get a better image by getting on the same level as the flower and getting some interesting background into your shot. You can also look for other colors that contrast with the color of your flower. Basic knowledge of the color wheel can help here so you can pick out opposite and complementary color backgrounds for your flower such as the yellow on blue that works nicely in the flower below.

Wild Flowersphoto © 2008 Craig ONeal | more info (via: Wylio)


6) Composition – There are many composition guidelines that work wonderfully for flowers such as the Golden Section and the rule of thirds. Even if you want to break these rules, it’s best that you know them well first. Also don’t ignore the potential for using flowers in a negative space composition such as the example below.

Orange Tower Flowerphoto © 2009 jeevan jose | more info (via: Wylio)


7) Get Out of the Wind - This is probably one of the biggest challenge for flower photographers. If a flower is dancing all over the place due to windy conditions, it forces you to change your camera settings when you may not want to. Many people get up eraly when the wind is least likely to be blowing so that they can shoot in more suitable conditions to control their shot.
Flowers really present the photographer with a unique opportunity for control in a natural environment. If you take a bit of care with your shooting choices and think about things before you press the shutter release, you can really get the exact shot that you want in a way that is difficult to emulate in most outdoor shooting situations. Best of all, photographing flowers is just a heap of fun.


Sunday, November 21, 2010

All about exposure

All about exposure by The Erotic Photo Lounge


All about exposure - Light is the basic substance that your camera captures or records. This article explains the primary elements that govern how much light reaches your camera and makes an image too light, too dark, or exposed correctly.
What Camera to Use?
Exposure affects all cameras, so really you can use any camera to experiment with it. SLRs are most adept at controlling the different parameters though so we recommend you use an SLR if available. You can try out the same effects using a compact or point and shoot, but you may find it harder to control the individual settings.

Exposure
Exposure is the term we give to taking a shot with your camera; it is the physical light hitting the sensor (or in the old days film) in your camera. Taking a good shot means learning to control exposure using the controls discussed below (just like learning to control a car via the throttle, brake and steering wheel).

What is a Stop?
A "stop" is the basic unit of light. Every time you "go up a stop" you are doubling the amount of light reaching the camera. So to increase by one stop means you are doubling the light; to increase by two stops you are doubling again (or 4 times increase in total). Likewise, "going down a stop" means you are halving the light coming into the camera; going down two stops means you are halving again (or one quarter of the light in total.)

Luckily, you don't have to remember these conversions. Just know that going up one stop means one more "full increment" of light and going down a stop means one less "full increment" of light. Depending on your camera, you should be able to go up or down in either one-third or one-half stop increments, giving you more precise control (i.e. 3 x 1/3 stop increments = 1 stop).

Three ways to control stops
There are 3 principal ways to control the stops of light:
  • Aperture - how wide the lens opening is.
  • Shutter speed - how long the camera is exposed to light.
  • ISO - how sensitive the sensor is to incoming light.
Measuring and controlling the stops
You can't actually count the total number of stops of light coming into the camera. The camera manages this internally. What you can do is determine that there are too many stops (too bright) or too few stops (too dark) and adjust accordingly.

If you are shooting in manual mode, your camera will show you an exposure gauge. If there are too few stops of light the gauge will show on the minus side, if there are too many stops the gauge will show on the plus side, and if you are spot on it will show zero in the centre.

If you are shooting in aperture priority mode you choose the aperture and the camera will automatically pick the right shutter speed to give the correct number of stops.

If you are shooting shutter priority mode you choose the shutter speed and the camera will automatically pick the right aperture to give the correct number of stops.

If you are shooting in automatic mode the camera chooses both aperture and shutter speed itself, giving you the least control over the shots.

Refer to your camera's instruction manual for how to change shooting modes. If you have an SLR camera you should experiment with manual mode - it will be a valuable learning experience for you. However, many photographers will often shoot in aperture priority mode as they don't have to control too many things at the same time and risk missing all the action.

Aperture
Aperture is how wide the lens opening is. You can control it to be a very narrow opening or a very wide opening. A wide opening is indicated by a low aperture number e.g. f/4, which is good for portraits. A narrow opening is indicated by a high aperture number e.g. f/22, which is good for landscapes. Markings such as f/4, f4, and just 4 all mean the same thing. The important thing is that the higher the number the narrower the opening. A wide aperture (low number) lets in many stops, i.e. lots of light. A narrow aperture (high number) lets in only a few stops, i.e. not very much light. The more stops an aperture lets in (i.e. wide), the faster your exposure can be (see shutter speed below); the fewer stops an aperture lets in (i.e. narrow), the longer your exposure needs to be.

The standard aperture sizes from widest to narrowest are listed below. Each increment is one stop less than the previous one. Not all apertures will be available on all lenses; usually only the middle of the range apertures are available.
  • f/1.4, f/2, f2.8, f/4, f/5.6, f/8, f/11, f/16, f/22, f/32
Use a wide aperture (low number) when:
  • You want a short depth of field, e.g. portraits. This will make the subject in focus and the background blurry. The subject appears to "pop out" of the background very prominently.
  • There is only low light available and you need to increase the stops of light.
  • You want to freeze the motion using a fast shutter speed.
Use a narrow aperture (high number) when:
  • You want a long depth of field, e.g. landscapes. This will make both the foreground and background both sharp at the same time. The foreground will not stand out from the background.
  • There is too much light available (e.g. bright midday sun) and you want to decrease the stops.
  • You want to blur the motion using a slow shutter speed (e.g. slow blur of a waterfall).
For glamour, erotic and nude shots we recommend f/4 - f/5.6 for a portrait or bust shot, and f/5.6 - f/8 for a full body shot.

Figure 1 shows the effect of aperture. On the left is a wide aperture shot which makes the subject jump out from the background. On the right is a narrow aperture shot which is more suitable for landscapes. Notice that the left shot focuses solely on the subject, while in the right shot the subject blends into her surroundings and is not as prominent.

Figure 1. Aperture. The left shot is using a wide aperture (f/4). The right shot is using a narrow aperture (f/11).

Shutter speed
Shutter speed is how long the camera remains exposed to the light. You can control it to be a very fast exposure or a very slow exposure. Shutter speed is indicated in fractions of a second, e.g. 1/60 of a second. Markings such as 60 and 1/60 mean the same thing. (Markings such as 2" indicate 2 seconds instead of fractions of a second.) Larger numbers indicate a faster shutter speed and lower stops of light, because less light can enter during a shorter period of time. Smaller numbers indicate slower shutter speed and more stops of light.

The standard shutter speeds from slowest to fastest are listed below. Each increment is one stop less than the previous one.
  • 30, 60, 125, 250, 500, 1000, 2000
Note: you can only "hand hold" a shot with a shutter speed of around 1/60 of a second or faster; any slower and you will get camera shake due to small movements in your hands (even if you think you have a steady hand!). There are two exceptions to this. First, using an Image Stabaliser (IS) or Vibration Reduction (VR) lens you can gain up to 3 extra stops for hand holding - down to about 1/8 second. Second, if you use a tripod you can shoot really slow shots up to around 30 seconds.

Use a fast shutter speed (high number) when:
  • You want to freeze motion, e.g. a frozen water fountain.
  • You are using a wide aperture (because the aperture allows a high number of stops and you need to balance this).
  • There is too much light available and you want to decrease the number of stops.
Use a slow shutter speed (low number) when:
  • You want to blur motion, e.g. slow blur of a waterfall.
  • You are using a narrow aperture (because the aperture only allows a small number of stops and you need to balance this.)
  • You are shooting in low light and you need to increase the stops of light.
For glamour, nude and erotic shots we recommend a shutter speed of at least 1/60 of a second. If your shutter speed indicates faster than about 1/2000 of a second then there is probably too much light around and this may result in other problems such as the model squinting or too high ISO.

Figure 2 shows the difference that shutter speed makes. On the left is a slow shutter shot which creates blurring of the water. On the right is a fast shutter shot that freezes the water mid-motion. For portraits and glamour shots shutter speed is not much of an issue, other than making sure you can hand hold the camera or controlling motion of water if your model is in a waterfall etc.

Figure 2. Shutter speed. The left shot is using a slow shutter speed (1/15 using a VR lens). The right shot is using a fast shutter speed (1/250).

ISO
ISO is how sensitive the camera is to incoming light. You can control the camera to be very sensitive so that it takes only a little light to illuminate the image (increases the number of stops) or not sensitive so that it takes much more light to illuminate the same scene (decreases the number of stops). ISO is marked in hundreds, e.g. ISO 100. Larger numbers indicate high sensitivity to light; lower numbers indicate less sensitivity.

The standard ISOs from least sensitive to most sensitive are listed below. Each increment is one stop more than the previous one. Not all cameras have all ISOs available.
  • 100, 200, 400, 800, 1600, 3200
Originally ISO was how sensitive film was to light. By inserting film with a fast ISO that reacted more quickly to the light we could take low light shots. The camera now controls the same function since it uses a digital sensor instead of film, but ISO retains exactly the same purpose.

Note: high ISO numbers result in "noise" in the image. These are slight variations in the color of each pixel, e.g. instead of being plain brown, the noise will introduce small flecks of light brown and dark brown in random patterns. In the film days this was called film grain and had a more pleasant, grainy appearance. In digital it just looks noisy. Significant noise is usually detectable around the 800 or 1600 ISO level, depending on your camera.
  • Use low ISO (lower numbers) for most conditions, such as bright sunlight, on a tripod or wide aperture.
  • Use mid ISO (around 400) when shooting mid light situations such as early evening, heavy shade or an overcast day, or when you want a really fast shutter speed for sports.
  • Use high ISO (high numbers, 800 and above) in low light situations such as a dimly lit room. Even in low light situations prefer to use a slow shutter speed, wide aperture or tripod before cranking up the ISO too high.
Figure 3. High ISO vs Low ISO closeups. The left shot is using high ISO and ambient light only. The right shot is using low ISO and a flash.

Balancing Aperture, Shutter Speed and ISO
Getting the right number of stops of light into the camera is a balancing act between aperture, shutter speed, and ISO. If you go down one stop in aperture (halve the light) then you can counteract this by going up one stop in either shutter speed (slowing it down) or ISO (increasing the sensitivity to light). Remember it as three corners of a triangle - aperture, shutter speed and ISO - that always have to remain balanced to get the right exposure.
Typically you start with a question: "how do I want to shoot this scene?" If your emphasis is on short depth of field (wide aperture) or long depth of field (narrow aperture) then you'll start with that and choose the other factors to suit. If your emphasis is freezing motion (high shutter speed) or blurring motion (slow shutter speed) then you'll start with that instead.

Useful Shooting Combinations
By using the tips above you can come up with sensible combinations for most shooting conditions. If you face a really difficult situation where no combination of settings gives you a good shot, this probably indicates that the available light is not adequate and any image would turn out poor (unless you introduced extra light such as a flash). Some combinations to remember are:
  • Portraits (face or bust): wide aperture (f/4 - f/5.6), low ISO (100 or 200) and mid shutter speed to suit (1/60 - 1/250 as a general guide). This will produce sharp facial features and a nicely blurred background, which focuses attention on the subject. Still life, food, or macro (close-ups of small objects): use the same settings as portraits above.
  • Full body portraits: medium aperture (f/5.6 - f/8), low ISO (100 or 200) and mid shutter speed to suit (1/60 - 1/250 as a general guide). This will produce a sharp shot of the body and its immediate surroundings. Distant backgrounds will still be slightly blurry and give emphasis to the subject. If you want to give greater emphasis to the subject then use a wider aperture (e.g. f/4) but be aware that depending on the pose not all of the body may be in focus.
  • Sports or movement: to freeze movement use a wide aperture (f/2.8 - f/4), medium ISO (400 to 800) and a high shutter speed (1/250 or above). This will freeze the movement quickly enough to capture it. To blur motion use a slower shutter speed (e.g. 1/60, or even lower with an IS / VR lens), low ISO (100 to 200) and a narrow aperture to get that motion blur. Sports is one situation where speed priority shooting is easier to control than aperture priority shooting.
  • Landscapes: narrow aperture (f/11 - f/16), mid ISO (200 - 400) and slower shutter speed (1/30 - 1/60) will make the whole scene sharp. No one element will stand out more than the others. Hold your breath slightly while taking the shot to help stay perfectly still. If your landscape has a large range of distances in the shot you can use even smaller apertures (f/22 or above) but you will need a tripod or IS / VR lens to cope with the slow shutter speeds involved.
  •